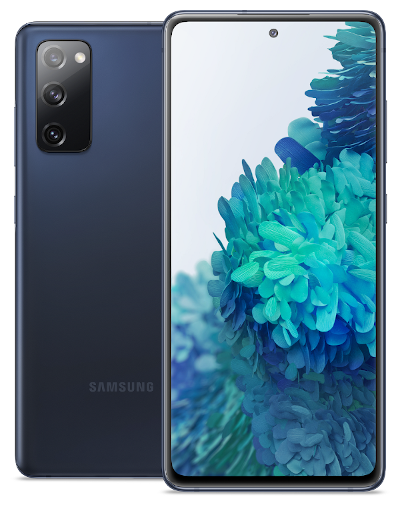
Update 2024-05-16: This guide below should still work, but I recently updated to newer versions of everything, so you might also want to check out https://kernelpanik.net/updating-vendor-firmware-and-lineageos-gsi-on-samsung-galaxy-s20-fe-5g/
In order to overcome the Samsung stock image with all its built-in and hard to remove bloat, I became interested in GSI (General System Image) aka Treble, which is a way to provide an up-to-date Android userland on top of vendor-provided kernel & firmware blobs.
Security-wise it's often a compromise.
Any vulnerabilities in the Android libraries and applications can be quickly fixed by updating just the GSI or the individual apps.
However, kernel vulnerabilities will not be fixed by updating the GSI.
That requires updates to the vendor partition. This is something that has to be taken from the stock images every once in a while (more to write on that in another post).
If a hardware manufacturer stops updating their stock images for your perhaps older phone, then you have to decide whether to take the risk. New Android on ancient Linux kernel.
Disclaimer: The description below worked for me, but there is always a chance that something doesn't work for you. I'm not responsible for turning your phone into a brick.
Backup your data
The whole phone will be wiped, so backup all your data as a first step.
Also check that your backup actually includes everything, for example photos, contacts, SMS, downloads, documents.
Unlock bootloader
Follow the guide on https://www.hardreset.info/devices/samsung/samsung-galaxy-s20-fe/faq/bootloader-unlock/samsung-bootloader/ to unlock your bootloader.
Ingredients
First you should get all these required files, so you have them at hand when you need them.
Stock image
As mentioned above, the Linux kernel comes from the vendor partition of the stock image. So in order to have a good starting point, you should update to the latest image version for the Galaxy S20 FE 5G, which was for me "G781BXXU4FVC4" (includes kernel 4.19.113-23739069, built 2022-03-28, vendor security update 2022-04-01).
Download the stock image from https://samfw.com/firmware/SM-G781B
Double check your model and choose the required country version.
Android platform tools (adb, fastboot)
Download from https://developer.android.com/studio/releases/platform-tools
I used version 33.0.1.
TWRP
The recovery image can be downloaded from https://androidfilehost.com/?w=files&flid=319768
I used twrp-3.6.0_11-6_afaneh92-r8q.tar.
Vbmeta Disabled
It's required to disable the Android Verified Boot (AVB).
See for more details: https://wiki.postmarketos.org/wiki/Android_Verified_Boot_(AVB)
Download from https://forum.xda-developers.com/attachments/vbmeta_disabled_r-tar.5236537/?hash=f7249adaefe16f3aeac3256a63063f0a
GSI image
In theory you can use any GSI, but I would suggest to use either PHH AOSP, which is kind of the reference GSI, or LineageOS GSI, which is based on PHH AOSP.
LineageOS 19.1, lineage-19.1-20220410-UNOFFICIAL-arm64_bvS.img (Android 12, security update 2022-04-05)
https://sourceforge.net/projects/andyyan-gsi/files/lineage-19.x/
PHH AOSP 12.1 v412, system-squeak-arm64-ab-vanilla.img (Android 12, security update 2022-04-05)
https://github.com/phhusson/treble_experimentations/releases/tag/v412
Update to lastest stock image
Use ODIN on a Windows VM with the Samsung USB drivers installed. Boot the phone into download mode (hold volume up + down + power).
Under "Options", disable "Auto Reboot" in ODIN.
Extract the downloaded ZIP file of the stock image.
Flash each component (BL, AP, CP, CSC) in ODIN.
I had to reboot into download mode each time after one component was flashed.
After you are done with CSC, boot again into download mode.
Flash Vbmeta Disabled
In ODIN, put Vbmeta Disabled file in AP slot and flash.
Reboot phone. It should go into stock recovery and prompt you to wipe it. Proceed and boot again into download mode.
Flash TWRP
In ODIN, put the TWRP file in AP slot and flash.
Reboot phone into TWRP recovery (hold volume up + power).
Reboot phone into fastboot mode through TWRP restart menu.
Delete product partition
Phones with dynamic super partitions don't provide enough space for the system partition of GSI images.
You can safely delete the product partition. It's not needed and can be re-created in case you want to go back to stock image.
$ fastboot delete-logical-partition product
Deleting 'product'           OKAY [  0.007s]
Finished. Total time: 0.007s
Flash GSI image
Flash the GSI image to the system partition:
$ fastboot flash system system-squeak-arm64-ab-vanilla.img
Invalid sparse file format at header magic
Resizing 'system'                          OKAY [  0.003s]
Sending sparse 'system' 1/7 (262108 KB)    OKAY [  9.835s]
Writing 'system'                           OKAY [  0.533s]
Sending sparse 'system' 2/7 (262124 KB)    OKAY [  9.831s]
Writing 'system'                           OKAY [  0.465s]
Sending sparse 'system' 3/7 (262116 KB)    OKAY [  9.924s]
Writing 'system'                           OKAY [  0.468s]
Sending sparse 'system' 4/7 (262120 KB)    OKAY [  9.753s]
Writing 'system'                           OKAY [  0.495s]
Sending sparse 'system' 5/7 (262084 KB)    OKAY [  9.197s]
Writing 'system'                           OKAY [  0.520s]
Sending sparse 'system' 6/7 (262124 KB)    OKAY [  9.028s]
Writing 'system'                           OKAY [  0.468s]
Sending sparse 'system' 7/7 (160776 KB)    OKAY [  5.456s]
Writing 'system'                           OKAY [  0.356s]
Finished. Total time: 68.455s
Reboot to recovery:
$ fastboot reboot recoveryFormat data
In TWRP, format the data partition.
Reboot
Now you should be done. The expected boot animation for your selected GSI should show up.
PHH Treble Settings
I had to enable these options after the first boot:
- Enable extended brightness
- Enable all cameras